Unknown's avatar

About Peg

I love cooking...basic southern style to sophisticated and modern cuisine, especially when my daughters and son in law are in the kitchen with me. Then it becomes a bit more festive! Traveling is something that I am passionate about. I achieved one of my loftiest goals a couple of years ago when we were in Vietnam. I spent days just photographing people. It was a blast; and the book i made brings me delight daily. Cheers!

Summer Tomato Cucumber Sandwich Perfection

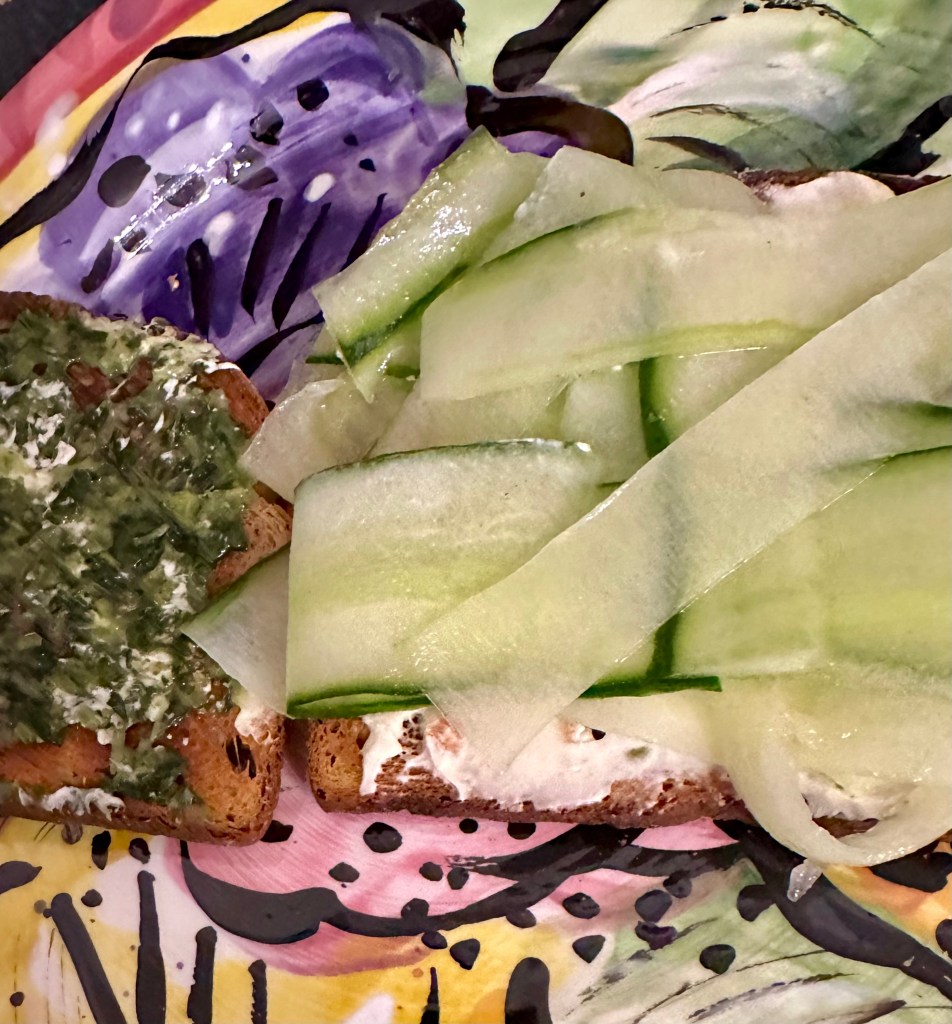
Happy Weekend one and all! I’ve got you covered for the upcoming holiday with your homes filled with family and guests. Hands down, this is worth knowing…best sandwich I’ve made, or have had made for me since 1964, and that was a plain grilled cheese from the Coral Bay Snack Bar (but I was young with underdeveloped taste at age 9)! Just advancing those taste buds for all people of the planet here. I mean tomatoes and cucumbers are in season; savor the flavor and savor the South. Ready, Set, Go!

~ 2 slices Killer Dave’s 10 Grain White Bread Done Right, toasted
~ 2 Tbs low fat vegetable cream cheese spread
~ 2 Tbs sweet Gourmet Garden basil paste (I use the tube)
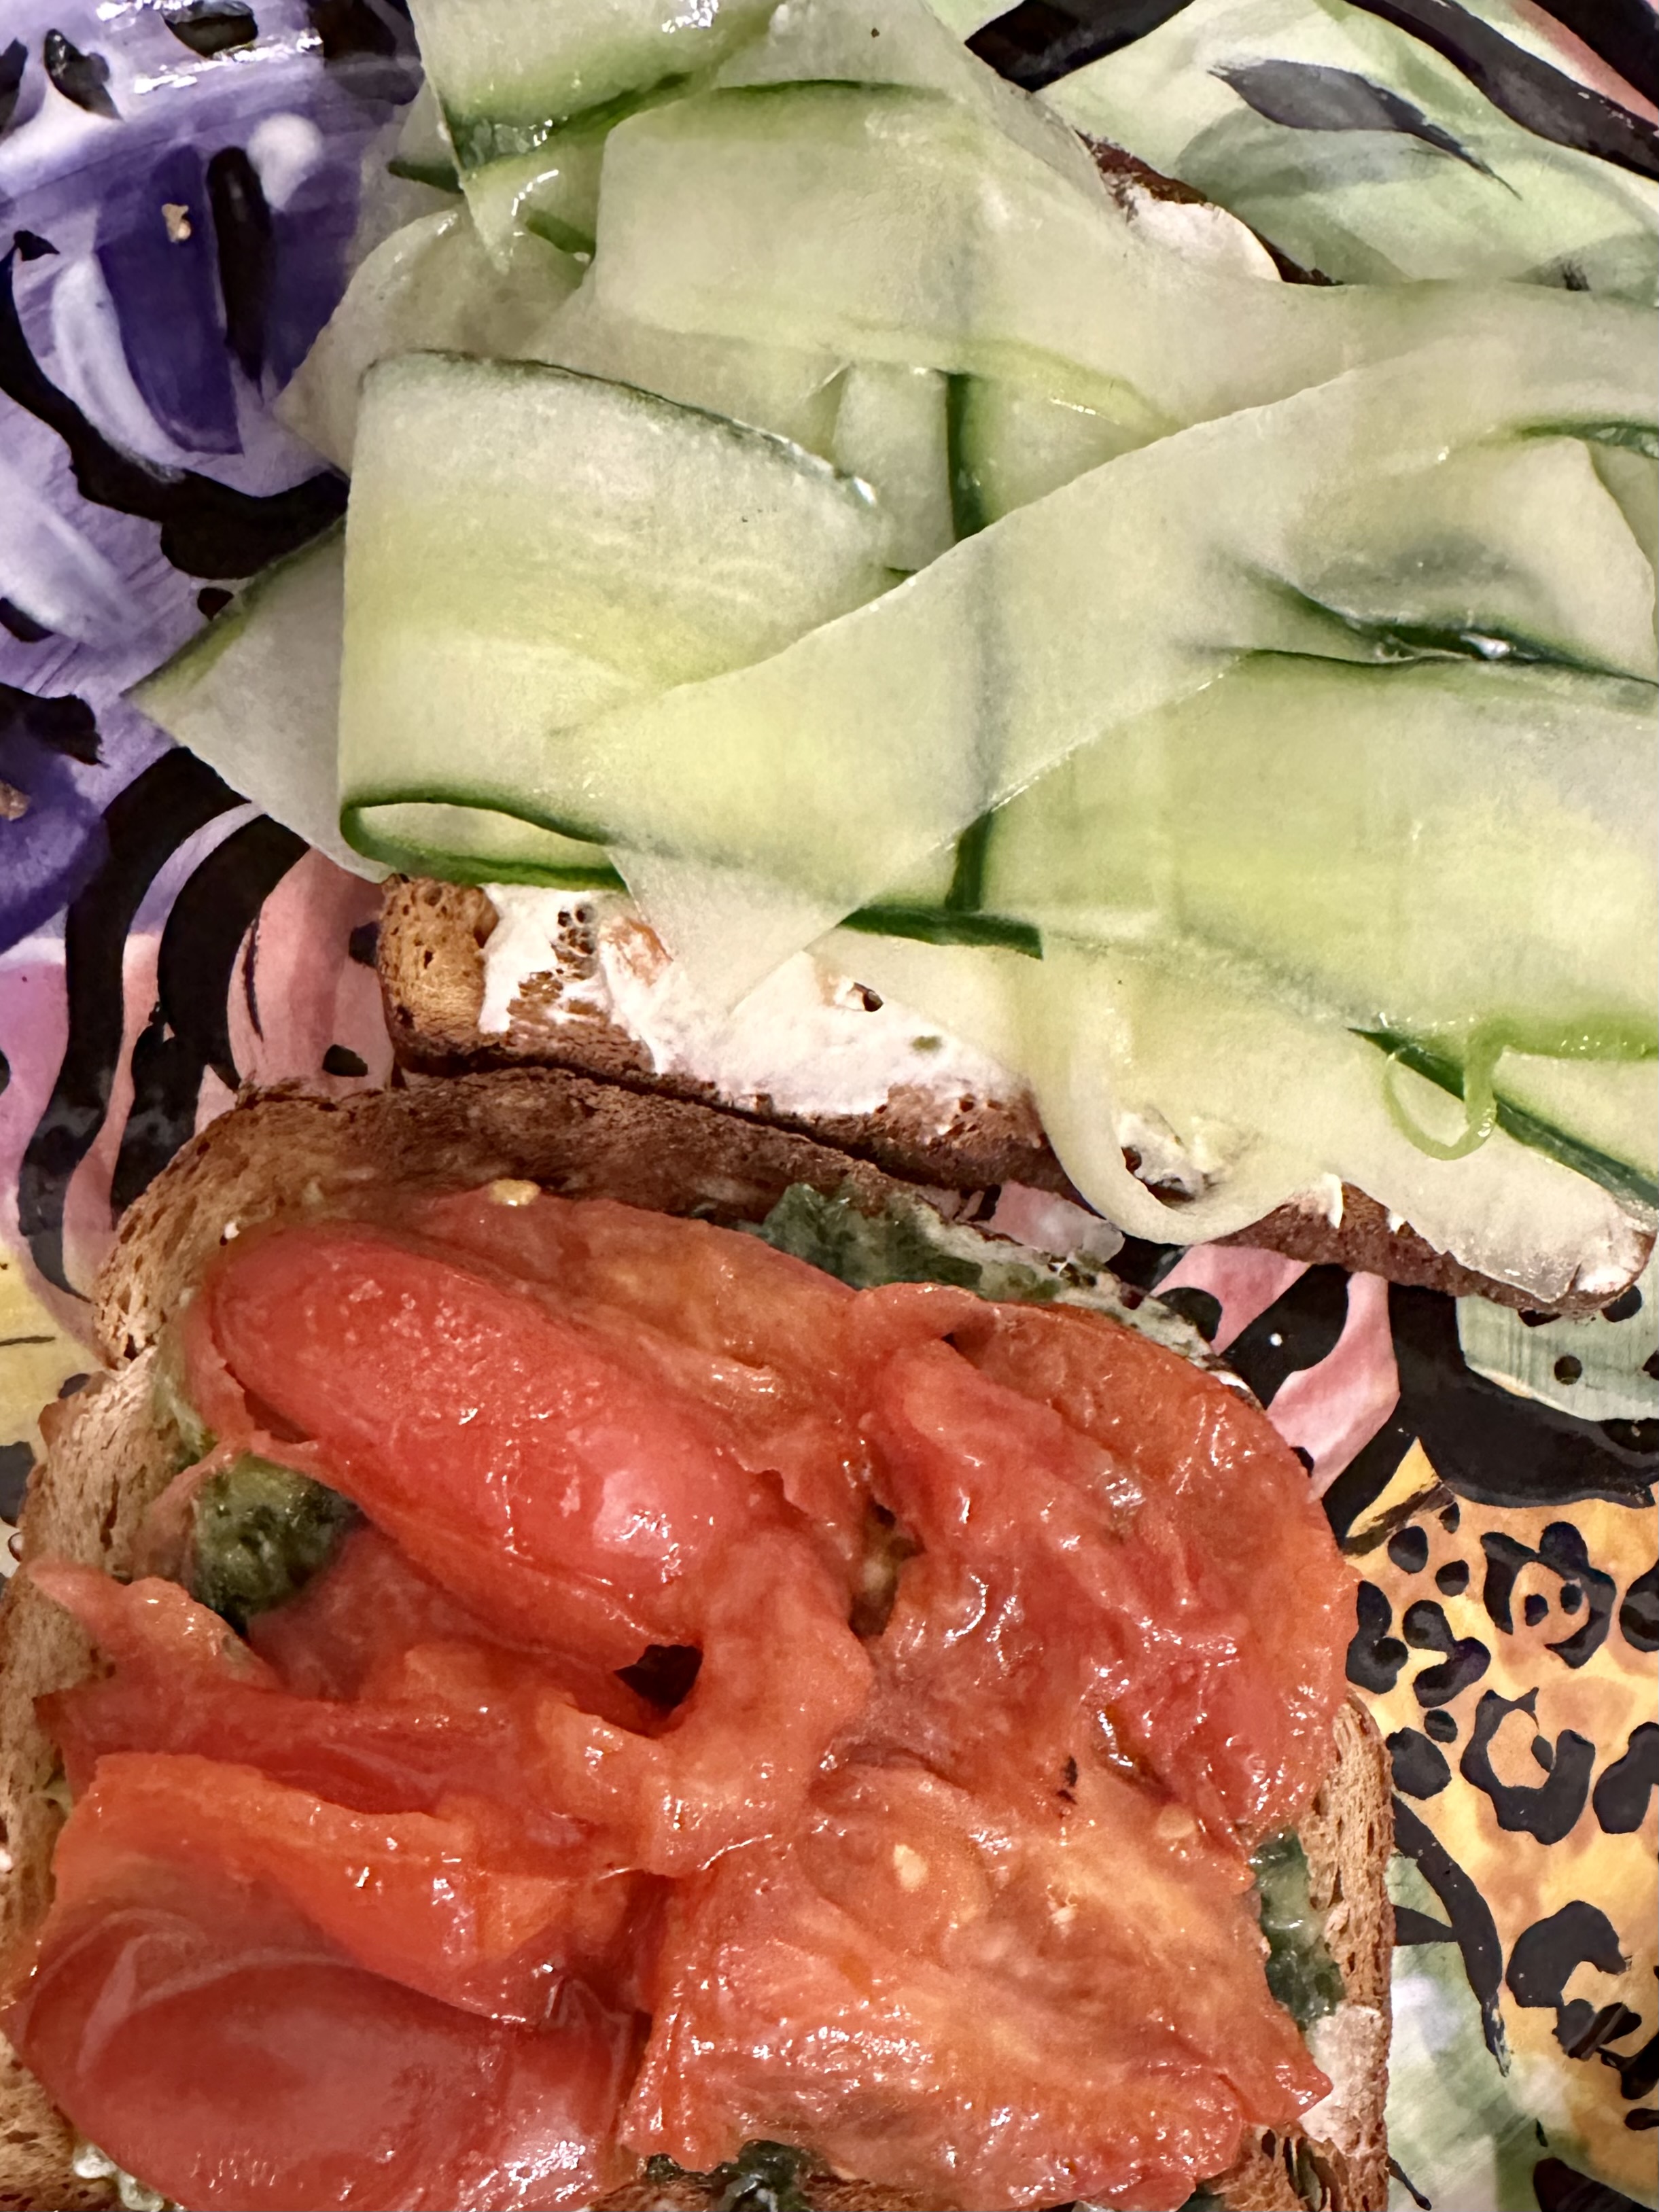
~ 1/2 English cucumber shaved into ribbons
~ 4 slices Heirloom tomatoes, pan sauteed 3 minutes
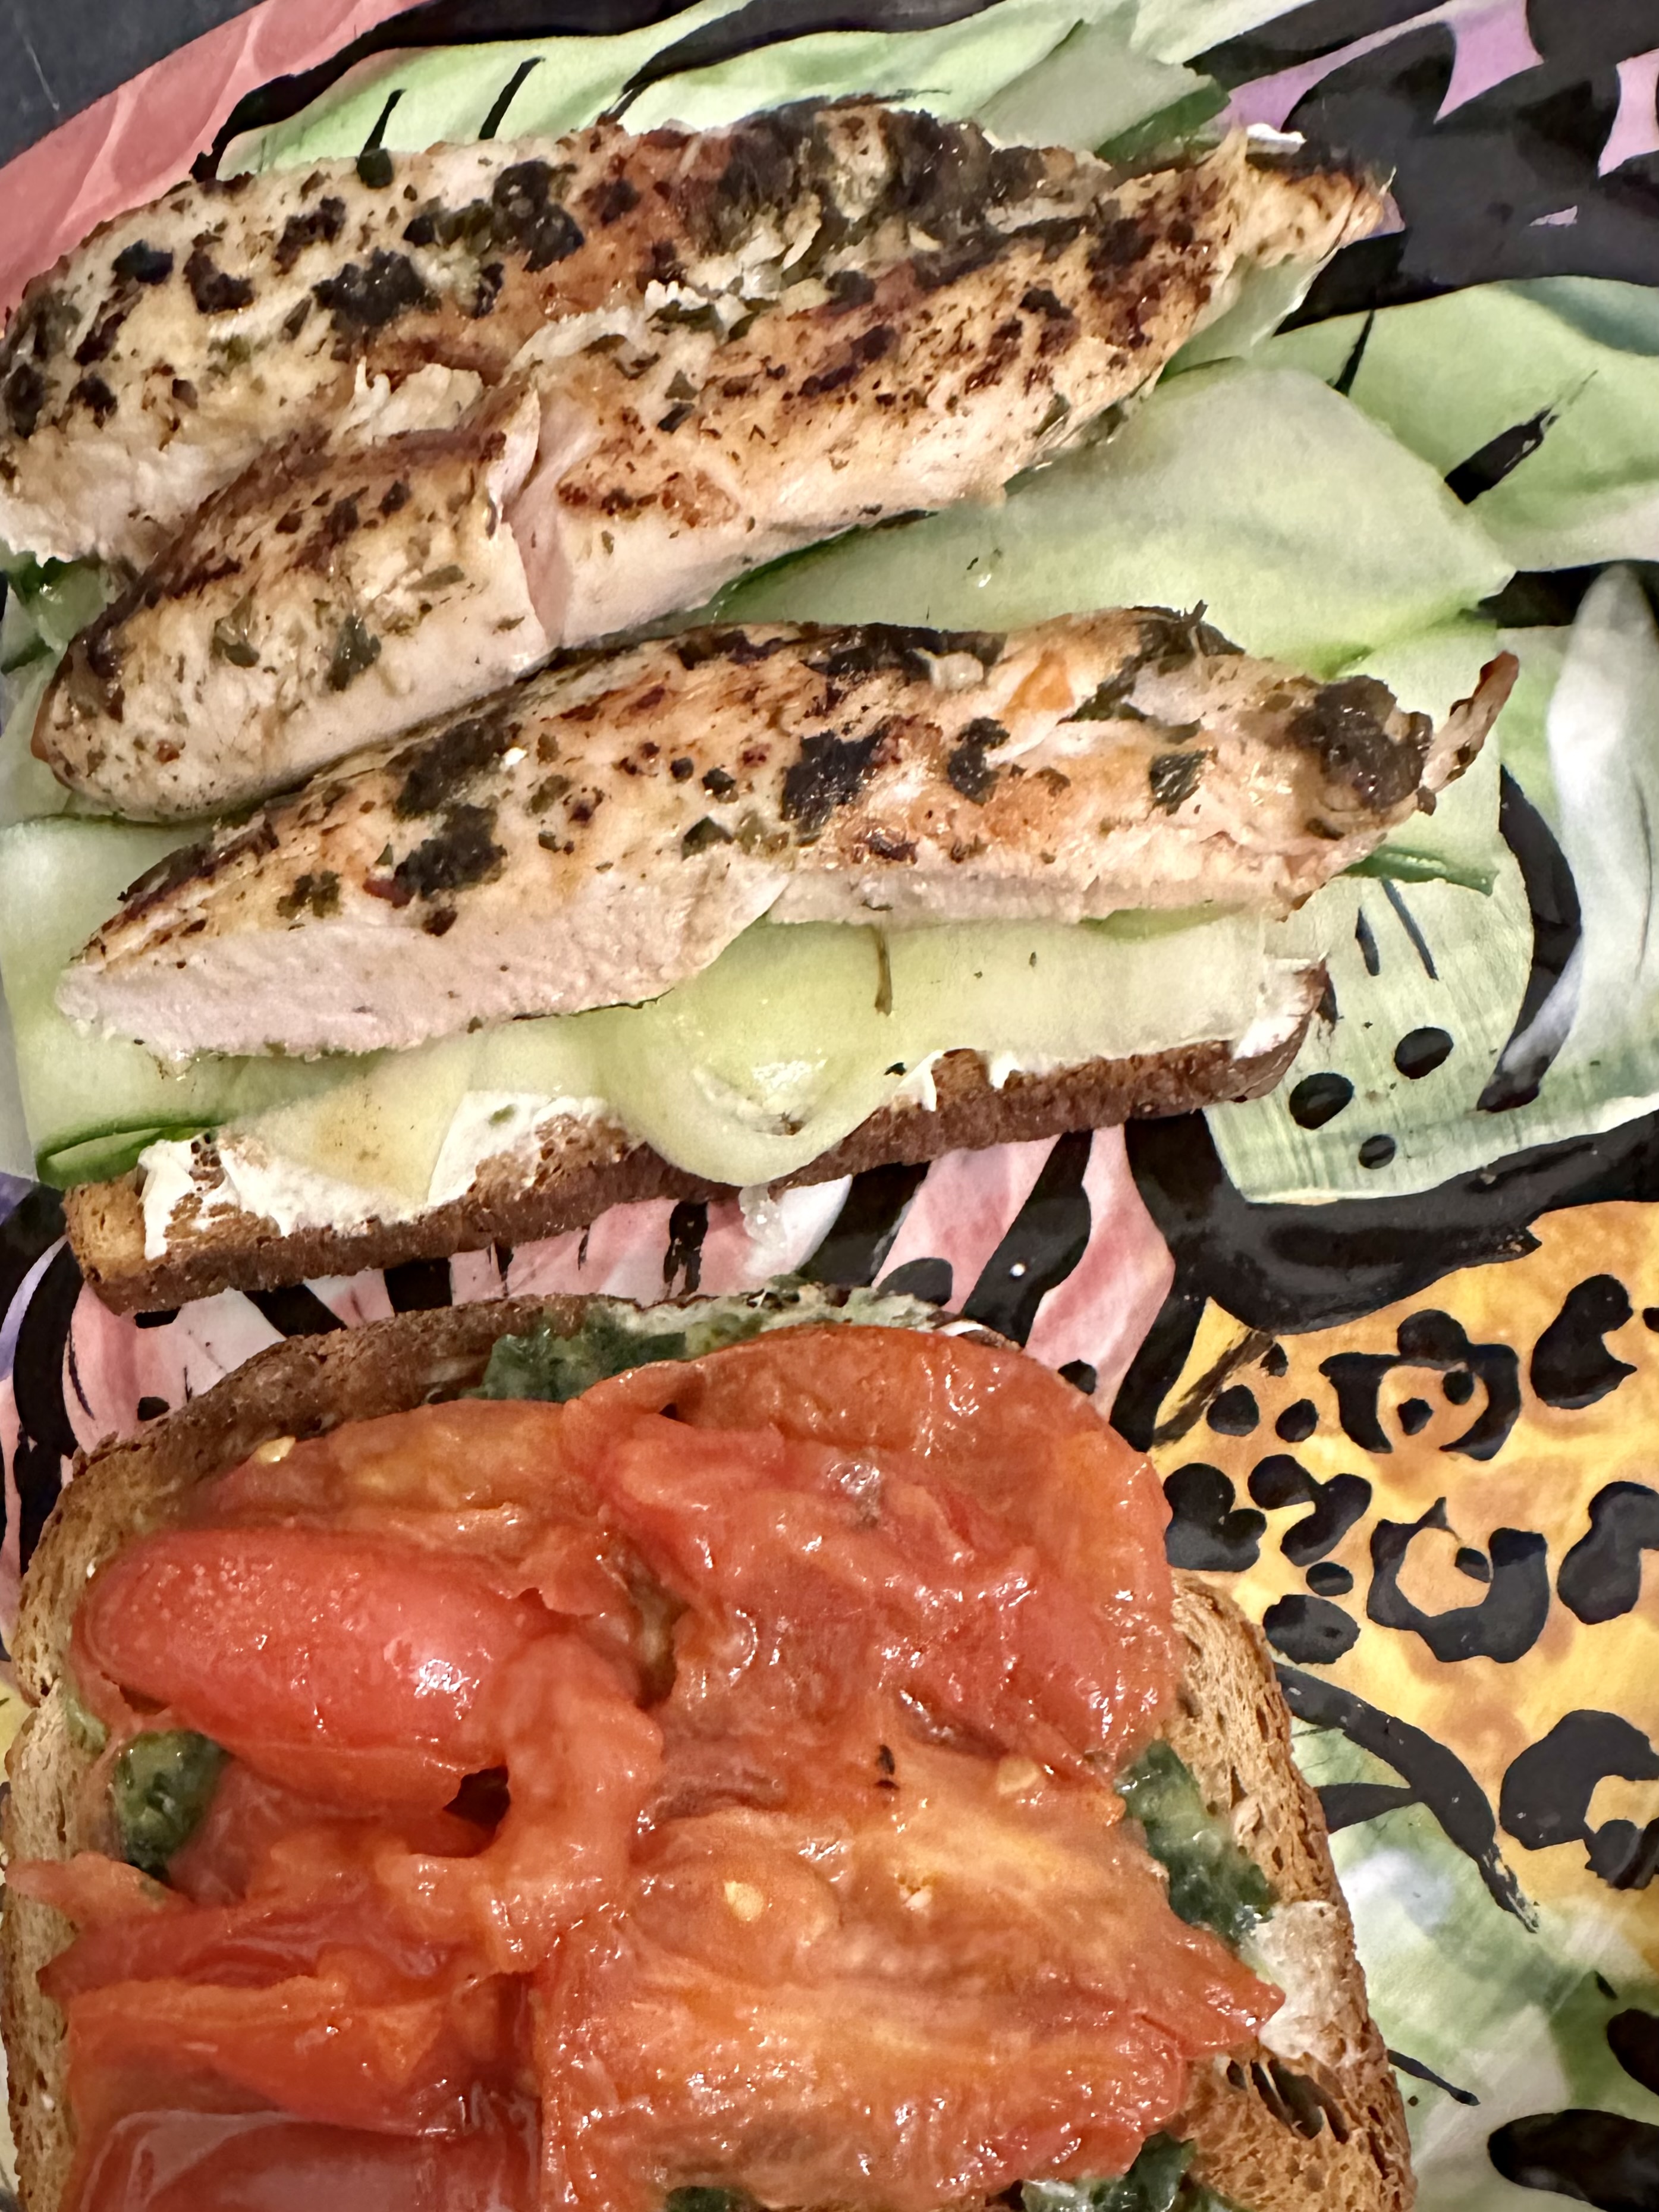
~ 1/2 chicken breast marinated with seasoning of our choice (I used Chimichurri from Fresh Market)

I spread the light cream cheese mixture on one slice of toast, and the basil paste on the other slice of toast. Then I topped one half with salted cucumber ribbons, and the other half with peppered sautéed tomatoes. I cooked the chicken breast in a skillet on high for 3 minutes, then flipped it and placed it in a 375 degree preheated oven and cooked it 4 more minutes. Took it out and let it rest 3 minutes, then sliced it into strips and placed them on top of the tomatoes. Placed those sweet sides together and sliced it on the diagonal, because I like that end triangular bite! Confession here…Then I savored 2 bites out of the middle, and the dogs and I shared the rest. the don does NOT like this sharing habit of mine, not at all. uh oh!

Simple Sassy Frozen Lemon Pie

Some forty days or so ago, the don and I were in Paris taking a private Technical Tarte Class with this darling chef at La Cuisine Paris. We created both sweet and savory tartes “à partir de produits bruts” as they say in French (translation ~ scratch from raw products). It reminded me of this wonderful child’s play easy lemon and fruit dessert that I’ve been making for years. Warm temperatures outside are calling this name. Don’t dare fret if the crust breaks a bit when you’re slicing. Remember John Dutton quotes his father in Yellowstone saying “You can always use the parts of a broken wagon wheel to make a new one.” So, if the shell breaks a little bit, use the lemon cream as glue! Life takes a lot of patching sometimes…let’s embrace it.

The only ingredients you’ll need are these:

~ 6 oz can frozen lemon concentrate, thawed
~ 1 can sweetened condensed milk
~ 8 oz container whipped topping, thawed
~ 1 9” purchased or homemade pie crust, graham cracker or plain


With electric mixer or blender, beat together lemon concentrate and condensed milk.
Fold in whipped topping.
Spread mixture in pie crust; cover and freeze, 6 hours or overnight.
Take pie out of freezer about 15 minutes before serving time.
Garnish with raspberries, blueberries, cherries, strawberries, lemon slices, and edible flower petals.
Slice and serve.
It’s so dreamy, you’ll never wake up.

Of course it’s always fun to serve special little individual pies. Make it easy on yourself and use the large premade crusts; just cut to fit your mold!

Coco Whip Poached Egg on Raisin Toast

Subscribe to continue reading

Subscribe to get access to the rest of this post and other subscriber-only content.

“Homemade” Pumpkin Muffins, Compliments of Trader Joe’s

So I’m a week late for Halloween, but guess what’s right around the corner? You bet…it’s the Holiday season for sure. And man oh man do I have a short cut for you. Do you or your family enjoy pumpkin muffins/bread? This is THE best and easiest combination ever. And if you don’t have a Trader Joe’s in your hood, well guess where you can secure the mix…that’s right, from the Bezos machine. Quite convenient. Truthfully, it will delight you. I’m all about short cuts, and this is THE best one ever! Knock yourself out and enjoy!

All you need is:
1 box Trader Joe’s Pumpkin Bread and Muffin Mix
Eggs
Water
Oil
Brown Sugar as a Bonus Mix ingredient.
Bake according to instructions.
Sprinkle with brown sugar immediately upon removing from oven.

Manchego Jam Twists

Welcome to cooking school…Ready for a crash course? Temp me please with jam and cheese! But first, a little history lesson; so pull out your notebook. Manchego (used in this recipe) is a semi-hard cheese from the sheep of the central province of La Mancha, Spain; remember the windmills in Don Quixote? That’s the place. Back in November of 2004 (yep, that long ago far away time) Brenton was studying in Spain, so we all ventured over to enjoy a Spanish Thanksgiving. We hopped the train from Seville to Segovia one day to see that charming town, which is adjacent to the region of La Mancha. Needless to say, they served cheese on every corner and every café in between! That was my introduction to the wonderful world of Manchego. Let the games begin…I’ll take cheese for $1000 please.

The image above was captured by Brenton (with an authentic 35 mm camera, waaaay before the iPhone camera). This is the Alcázar of Segovia (Castle), dating from the early 12th century. The town is in the unpictured foreground, with the view of Castile and Leon region in the background.

Enough brain infusion for today. Now on to the recipe. My platters are always on call for hors d’oeuvres!

This is all you’ll need:

All purpose flour for dusting
1 sheet frozen puff pastry, thawed
2 Tbs strawberry jam
1 cup grated Manchego
1 egg
*Remember please that I am an unapologetic messy baker; evidence follows!

Here are the particulars:

Preheat oven to 400°.
Line baking sheet with parchment paper.
On lightly floured surface, roll out pastry to 12 x 14 inch rectangle.
Cut dough in half at center of short side.
Spread one half of pastry with jam.
Sprinkle evenly with cheese, reserving 2 Tbs.
Top this with other piece of pastry.
Press gently to adhere.
Cut with pizza cutter into 1/2 inch wide strips, about 18 pieces.
Twist each piece 4 to 5 times, pinching ends tightly.
Place on baking sheet.
In small bowl, mix egg with 1 t water.
Brush onto twisted pastry.
Sprinkle with remaining cheese.
Bake until golden, about 12 to 14 minutes.
Let cool slightly before removing from parchment.
Serve immediately.

Makes “18ish”.

Cheese & Jalapeño Sour Cream Muffins

This is what you’ll need to create these treats:

Cooking spray
3/4 cup fine corn meal
1/4 cup all purpose flour
1 Tbs sugar
1/2 t kosher salt
1/2 t baking powder
1/4 t baking soda
3 Tbs light sour cream
3 Tbs canola oil
2 eggs
3 Tbs chopped jalapeños
3/4 cup shredded reduced fat cheddar cheese

Preheat oven to 400°.
Lightly coat 8 muffin tins with cooking spray
Combine cornmeal, flour, sugar, salt, baking powder, and baking soda in large bowl.
In separate bowl, whisk together sour cream, oil, and eggs.
Add sour cream mixture to cornmeal mixture, stirring until just combined.
Fold in jalapeños and cheese.
Divide batter evenly among muffin cups.
Bake 12 to 15 minutes until golden.
Insert knife or pick in center to test for doneness.
About 150 calories per muffin.

I was in Cabo when I concocted these little nuggets of a muffin, taking full advantage of the abundance of jalapeños. Fun fact: jalapeños account for thirty percent of Mexico’s chili production. I snapped the above left photo at the end of the day when they were freshly baked and the sun was streaming dreamily in through the living room window. The next day we pulled out the preserves and enjoyed brunch with the muffins reheated, along with Donaldo’s delicious version of Huevos Rancheros, where flavors comingle in the best imaginable way.

Donaldo is his Cabo name, assigned by the Diamante caddies. He is on those golf courses when not in the kitchen with his skillet in hand! Go on, send your taste buds on holiday.

Halloumi Za’atar Grilled Toast

Yummmmm…za’atar, that delicious Middle Eastern herb seasoning. I was first introduced to this seasoning at the Old Spice Souk in Dubai. The year was 2013 and we took an abra across Dubai Creek where a purveyor invited me to smell it. Then he sprinkled it on a slice of grilled halloumi and I was hooked for life. Join me on this journey half way ’round the world! This halloumi toast is terrific cut into small squares for an appetizer, or halve the whole piece of toast and serve it for brunch.

4 Tbs olive oil
3 Tbs minced fresh parsley
1 Tbs minced fresh oregano
Zest and juice of 1 lemon
1 Tbs Za’atar seasoning
1/2 t ground pepper
8 oz halloumi cheese, sliced into 3/4” slices
4 slices hearty sourdough or strong wheat bread
1 clove garlic, halved
1 cup microgreens

Whisk together olive oil, parsley, oregano, lemon juice, za’atar, and pepper.
Brush both sides of halloumi and bread with oil mixture.
Grill halloumi and bread on both sides until charred, 1 to 2 minutes per side.

Rub one side of bread with garlic.
Top toasts with halloumi.
Drizzle with remaining oil mixture.
Sprinkle with lemon zest and micro greens.
Serves 8 for appetizers or 4 for brunch.

To the left is pictured a brunch serving of this wonderful toast, cut on the diagonal. I added bean sprouts, and pink salt to jazz it up a bit.

Baked Spaghetti Squash

Canyon Ranch, be still my heart, soul, and body. I would like to write you a love letter, because you provided so much positive assistance to me; alas, I pause…sort of! I have a series of recipes based on my Ranch experience. They cook with uncommon creativity, making everything healthy and tasty. I’m revealing secrets from the premier health institute in the USA. Enjoy. This is a national treasure and I’m certain that this recipe (and more shortly) will become a staple on your spreadsheet. Hit the pause button and enjoy. Sending love, good health, and lots of happiness!

Medium spaghetti squash
Pinch salt
Pinch black pepper
Baking spray to prep baking sheet

Images: Top Left ~ Whole Spaghetti Squash – Top Right ~ Top half seeded, bottom half, not!
Lower Left ~ Face down on cooking sheet – Lower Right ~ Straight out of the oven

Preheat oven to 375°.
Spray baking sheet with small amount of canola oil.
Cut spaghetti squash in half.
Scoop out seeds.
Place cut side down on baking sheet.
Bake 45 minutes or until soft.
Remove from oven and set aside until cool enough to handle.
Shred squash with a fork into a bowl.
Makes 6 one cup servings.
35 cal per serving.

I add this baked version to a salad for extra flavor and fiber.
I really love this plain, warm out of the oven, room temp, or chilled.
The “add ons” can enhance the flavor if so desired.
You may add spaghetti sauce, maple syrup, Parmesan cheese, or top up a sandwich if you’re in the mood, just for extra fun. Pictured below is the squash topped with my homemade tomato sauce, along side a sculpture from my private collection by Jeff Kiefer.

The Rooms Where Life and Art Happen

The new issue of Veranda magazine arrived yesterday with the cover story titled “Living with Art” and that reminded me that it was time to make an art post. Their inspiration was the following quote from Henri Matisse, huge in my admiration pool of artists. “Art should be something like a good armchair in which to rest from physical fatigue.” The painting that inspired them is titled Large Red Interior, currently on view at the MoMA in NYC. It made me think of my own Matisse replica, Still Life with Sleeping Woman, that I purchased from the gift shop at The National Gallery way back in the late 1980’s. I was a young mother at the time, and it reflected perfectly how I often felt at the end of the day. It has been a staple on my desk for all of these years; now it inspires me to pick up my head and get on with the tasks at hand!

I have a deep appreciation for my collection of original art (more on that soon), but two rooms in my home feature replicas as well…the Matisse plaque in my kitchen, and the living room TV screen saver featuring an image of Gustav Klimt’s Fulfillment. I’m slightly obsessed with Klimt! I’m beyond thrilled to be attending the inaugural exhibition at the new Hall des Lumieres in NYC next month, titled Gustav Klimt: Gold in Motion. Follow the link and check out this new exhibition space featuring immersive art exhibitions in a digital art center. It is housed in the historical former Emigrants Industrial Savings Bank. This is brought to North America from Culturespaces, France’s leading private manager of museums and cultural heritage sites. This is certain to be one for the memory bank!

Slice and Bake Cheese Wafers

School Days, School Days, Dear ole Golden School Days…Children arrive home “hangry”. So have this prepped and ready in your fanny pack (I hear they’re making a comeback!). I suggest forgetting the pecans for your grade schoolers, but that version may be nice for a dinner party app for friends, also fun to sprinkle with a bit of powdered sugar. Just thinking out loud. Food is meant to temp as well as to nourish. Perfect snack. Afterall, Life is Too Short for Dull Food! Go Bake it!

1 stick butter, sliced
2 cups coarsely grated extra sharp cheddar cheese
1/2 cup finely grated Parmesan cheese
1/2 t kosher salt, plus more for sprinkling on top
1/4 t cayenne pepper
1 cup all purpose flour
Garnishes may be powered sugar, pecan halves, sliced olives, thyme leaves.

Combine butter, cheeses, salt, cayenne, and flour in food processor.
Pulse several times until crumbly.
Process 30 seconds more until a mass forms.
Transfer dough to sheet of parchment paper.
Roll into log about 2 inches in diameter.
Wrap in the parchment and refrigerate for at least an hour, or overnight.

Preheat oven to 350 degrees.
Cut the chilled dough into 1/4 inch slices.
Arrange on parchment lined baking sheet.
Top with preferred garnish if you like.
Bake 12 minutes or until golden and crisp.
Immediately sprinkle with salt.
Transfer to wire rack to cool.
Wafers can be stored in airtight container for up to a week.

This cheese wafer is the good-time, slice and bake cousin of the cheese straw.
Keep a log of cheese wafer dough in the fridge, and in 20 minutes you have a delicious little treat.
Dough may be wrapped in parchment, then in aluminum foil, then placed in zip top freezer bag. It may be frozen for 3 months.